

The best way to make venison jerky from ground meat in your oven doesn’t require that much preparation. And the venison jerky you get is some of the safest and healthiest snack foods you can find.
By Daniel E. Schmidt, D&DH Editor-in-Chief
I swear we have to answer this question by trial-and-error once a year — or at least that’s the way it seems: How long does it take to make venison jerky in the oven when you’re using ground meat?
The problem is it varies depending on the oven’s temperature, the grind of the meat (course vs. fine) and the tools and seasonings (and cure) used to make the jerky. So this weekend we were at it again, trying to determine the best way to make jerky in our oven and keep it safe. I should note that my wife and I are extra paranoid about food safety, mostly because she’s a certified food preservation specialist and she knows all-to-well of the dangers lurking in underprocessed meats, vegetables and fruit.

Properly prepared venison jerky will bring smiles to your entire family. (photo by Dan Schmidt)
We started by testing the temperature of our gas oven. To do this, we used a remote thermometer Tracy said it is unwise to trust the factory-installed dial on any oven or dehydrator. She was right. Although the oven’s gauge said “170,” the actual temperature was about 164. Plenty fine to make jerky, but any hotter than that and it would be difficult because it could overcook the jerky on the outside while leaving undone pockets on this inside. With ovens, the common recommendation is to leave the door slightly propped open. This assists in air flow, which is the whole point of drying meat for jerky. You don’t want to cook it; you want to dry it out. With the oven door open, the temperature hovered in the 155 range.
When making jerky from ground meat, be sure to use pure venison (no mix). Mixed meat contains fat, which will be much more difficult to dry. (photo by Dan Schmidt)
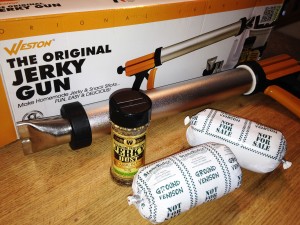
To make the jerky, I enlisted the help of a Weston Jerky Gun kit. Where has this been all my life? We’ve used cheap jerky guns that we’ve bought from the local farm/department store, but they were just that: cheap and unreliable. Weston’s original jerky gun is the Cadillac of jerky guns. It’s big — holds almost 2 pounds worth of ground meat — and built to last. It also shoots out two strips of jerky at a time.
I started by taking two pounds of pure ground venison (no pork mixed with it, which is important) and placed it in a big glass bowl. Next, I combined the prepackaged seasoning mix and cure, and mixed it thoroughly into the meat with my hands (wearing food-grade gloves). From there, I packed the meat into the jerky gun and tamped it down with a plastic plunger that comes with the kit. The mixed jerky meat was enough to fill up two large wire racks.
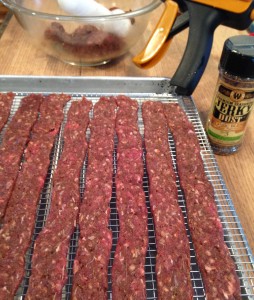
Ground venison strips ready for the oven. (photo by Dan Schmidt)
The racks went into the preheated oven for 2.5 hours. They were then taken out briefly so I could blot off oil spots that sweated through the meat during the drying process; flipped the jerky pieces over, and returned to the oven for another 2.5 hours. After 5 hours, we took the jerky out once more for blotting then turned up the oven to 275 — allowed it to obtain that temperature — then returned the jerky to the oven for 10 minutes. This last step is crucial when making any kind of jerky in an oven. The 275-degree temperature will kill of any pathogens that might still be in the meat.
When the jerky is done, it should bend and break … but not snap.
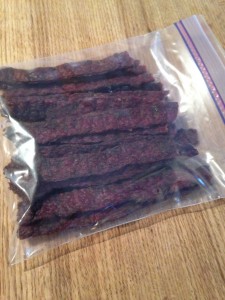
Jerky should be kept in an air-tight bag or canister. (photo by Dan Schmidt)
If you are making ground-meat jerky in a dehydrator, be sure to check the temperature of your dehydrator before drying jerky. Again, do not rely on the dehydrator’s temperature settings when making jerky. To check the temperature, place the metal stem of a dial thermometer between two dehydrator trays so that you can read the dial outside the dehydrator. Turn on the dehydrator, and allow the temperature to stabilize. Adjust the thermostat as necessary to obtain the desired temperature. The University of Wisconsin-Extension does not recommend drying temperatures below 145 degrees F. Unless strict precautions are observed for handling and drying meat, drying temperatures below 145 degrees may produce an unsafe product.
Drying Temperature Minimum Drying Time
145°F 7 hours
155°F 4 hours
The end product for us was two Zip-Loc® bags full of tasty protein snacks for us and our kids. Of course, I’ve had to hide the bags, because little hands seem to be skilled at taking more snacks than they should!